
In this article, you will learn how to activate the time clocking feature, configure company-wide overtime rules, and assign hourly compensation rates to your technicians.
Automating your time clocking setup eliminates manual calculation errors and ensures that employee pay calculations are accurate across your business operations.
Activating and Configuring Time Clocking Settings
In order to establish global time clocking rules and pay multipliers, you will need to access your JobyDesk Add-On Center and Settings.
1. Enable Time Clocking:
Navigate to the Add-On Center on the left sidebar. Under Operations, find the Time Clocking card and toggle it on.
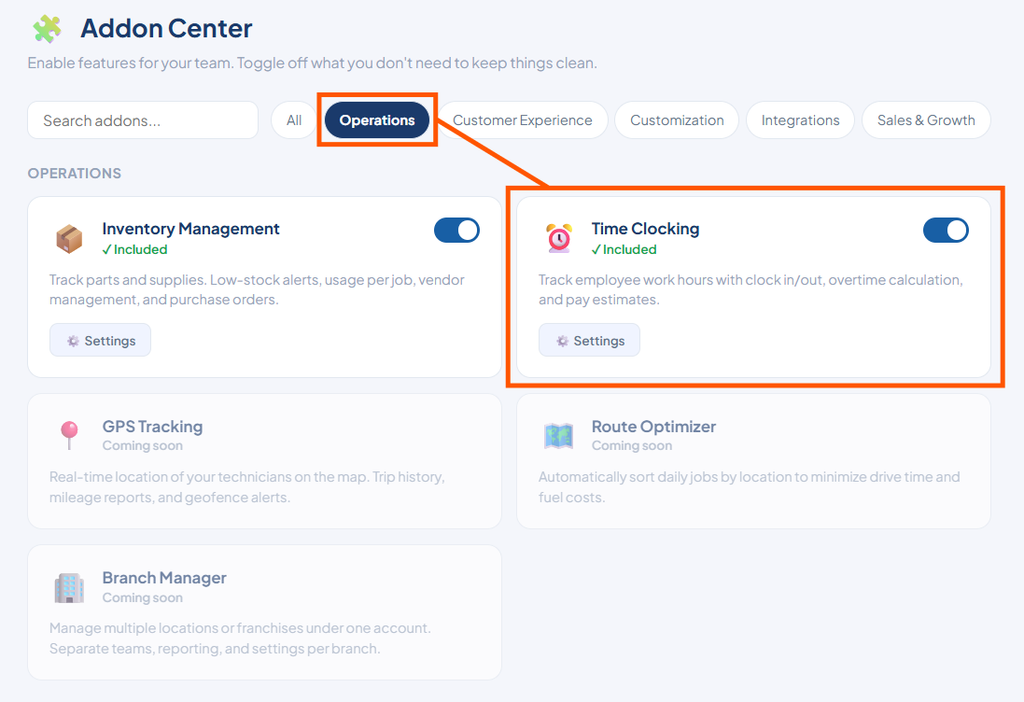
2. Configure Company-Wide Rules:
Click Settings on the Time Clocking card.
- Customize daily and weekly thresholds to establish when standard pay converts to overtime.
- Set specific pay multipliers for overtime hours.
- Toggle on Show Pay Estimates to enable automatic payroll calculations on your dashboard.
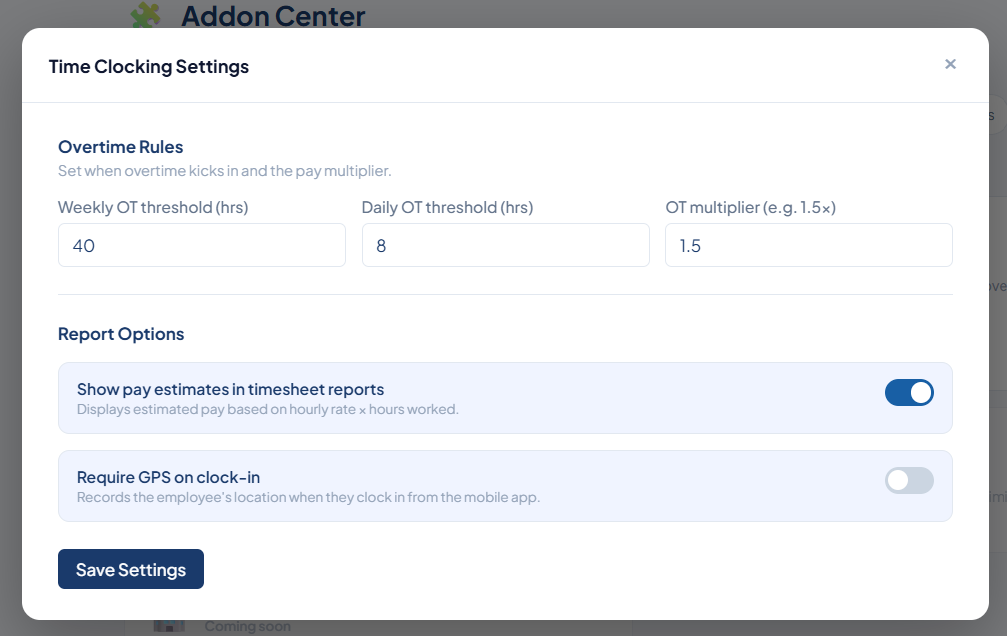
3. Save Configuration:
Click Save Settings to confirm your changes.
Assigning Hourly Pay Rates to Technicians
In order to link compensation settings to technician profiles, you will need to access Team Settings.
- Access Team Settings: Go to the left sidebar, click Settings, and select Team.
- Select Technician: Locate the technician you wish to update and click Edit.
- Set Rate: Scroll down to the Compensation section, enter their exact hourly rate, and save the settings.
Note
Enabling “Show Pay Estimates” in your settings automatically connects assigned technician hourly rates to time tracking reports for estimated earnings.
Once compensation settings are saved, employee pay rates link directly to the technician’s mobile application.