
In this article, you will learn how to enable, configure, and send interactive documents and e-signatures for your field service business.
Streamlining client authorizations and waivers is crucial for maintaining efficient operations. By utilizing the JobyDesk Add-on Center, you can upload custom PDF templates, make them interactive with drag-and-drop fields, and effortlessly track signed agreements directly attached to your customer job files.
Enabling and Uploading Document Templates
In order to use electronic signatures and PDF templates, you will first need to activate the feature in your settings.
1. Navigate to the Add-on Center:
From the left-hand sidebar, click Add-on Center.
2. Access Customization:
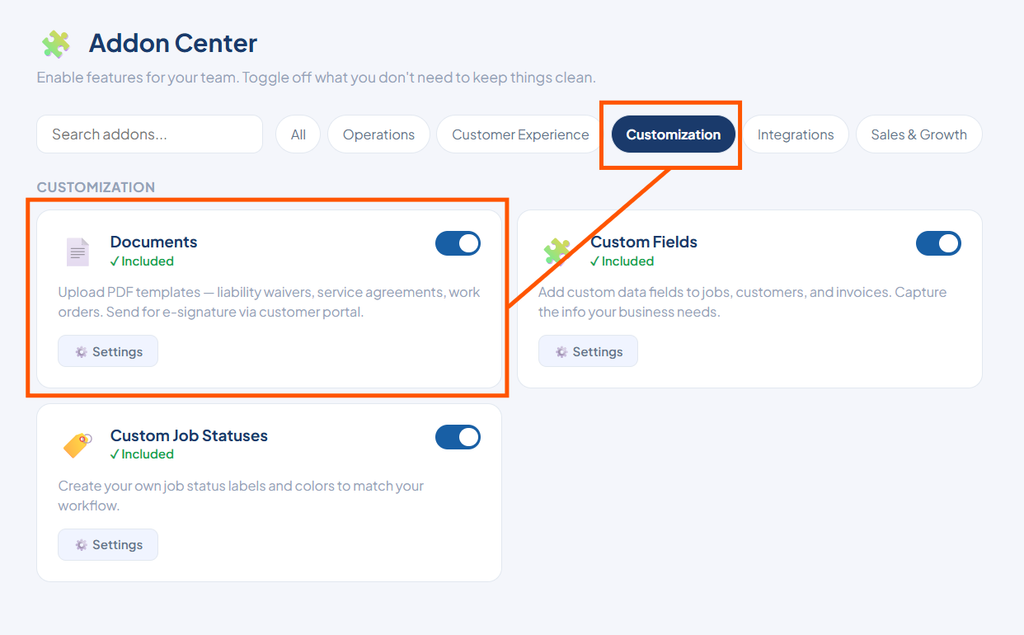
Head over to the Customization tab and locate the Documents card.
3. Enable the Feature:
Toggle the feature on to enable PDF templates (such as liability waivers, work orders, and service agreements), then click Settings to open your management hub.
4. Open the Templates Tab:
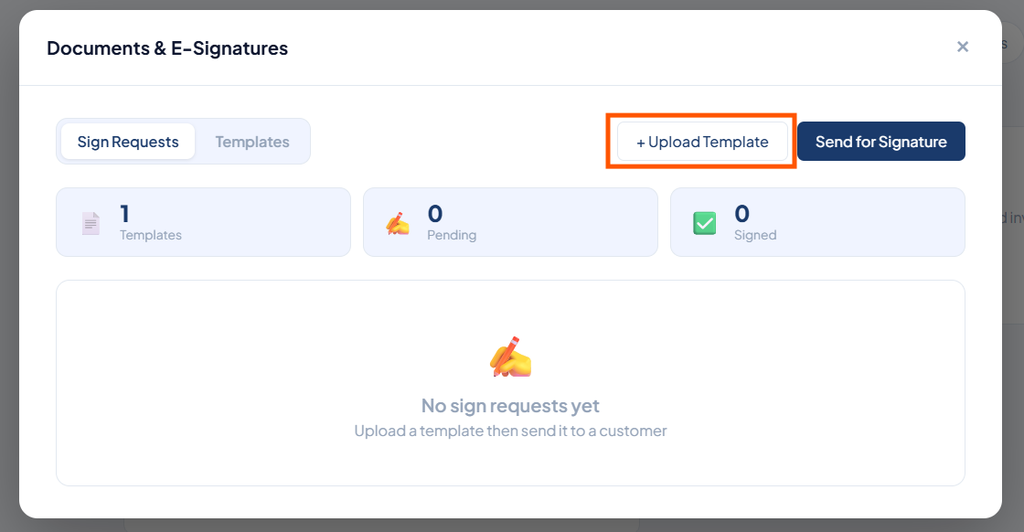
Inside the documents window, click over to the Templates tab.
5. Upload a Template:
Click the + Upload template button, give your template a name, select the custom PDF document your business has created, and hit Upload.
Configuring Interactive Fields
Once your template is uploaded, you can customize it so customers can easily fill out and sign the document online.
1. Open the Field Editor:
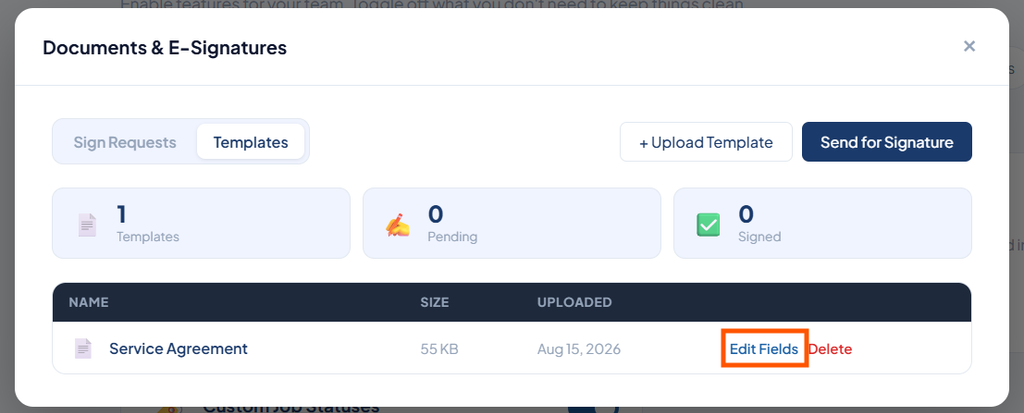
Find your newly uploaded template in the list and click Edit fields.
2. Drag and Drop Elements:
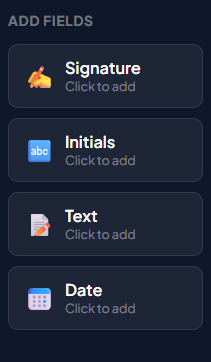
Use the left menu of the field editor to drag and drop elements directly onto your document (such as date fields, signature blocks, and text boxes for printed names).
3. Configure Field Requirements:
Toggle individual fields as required if they must be completed or leave them toggled off for optional inputs (like additional notes), so customers aren’t forced to fill them out.
4. Save Your Fields:
Once you are happy with the layout, click Save fields.
Sending Documents to Customers
When you need to collect a signature on a live job, you can send the document directly through the platform.
1. Open an Active Job:
Navigate to the left sidebar, click the Jobs tab, and open any active job ticket.
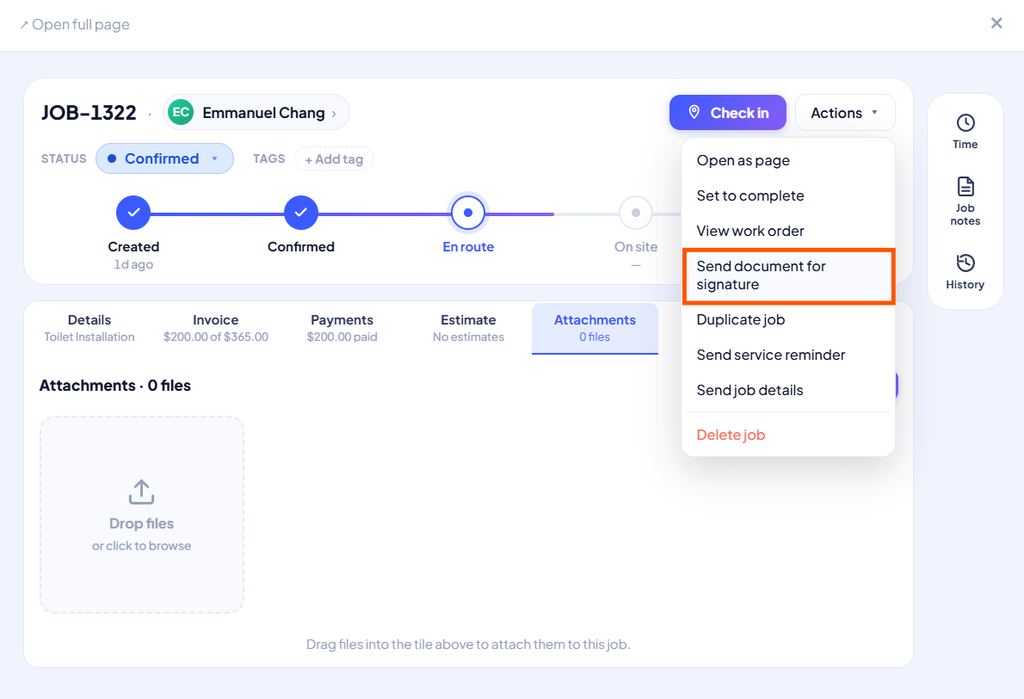
2. Select Send Document:
Click the Actions dropdown menu and select Send document for signature.
3. Choose Your Template:
The system will automatically link the customer, so you just need to select your template from the options and hit Send.
Note
When the customer receives the document via email, they can securely view and sign it inside their personalized customer portal. They will type their name, draw their signature on the digital draw pad, and hit Sign and submit.
Tracking Signed Documents
Your team will instantly receive an email and an in-app notification the moment a document is signed.
1. Locate the Job Ticket:
Return to the specific job ticket in JobyDesk.
2. Check Attachments:
Notice the red notification badge on the Attachments tab.
3. View the Final File:
Open the attachments to view the finalized, legally binding PDF.
All signed documents remain securely attached to the specific job and are organized in one place for easy access if a customer calls months later.
Related Articles: