
In this article, you will learn how to customize and create job statuses to fit your business operations.
Custom job statuses provide field service leaders with a simple yet powerful way to tailor software workflows to match exact company terminology and real-world processes. By organizing your board with personalized terms and colors, your team can track the precise lifecycle of every job, improving clarity and efficiency across your entire operation.
Setting up custom job statuses
In order to edit existing statuses or build new ones, you will need to access your system settings.
1. Navigate to settings:
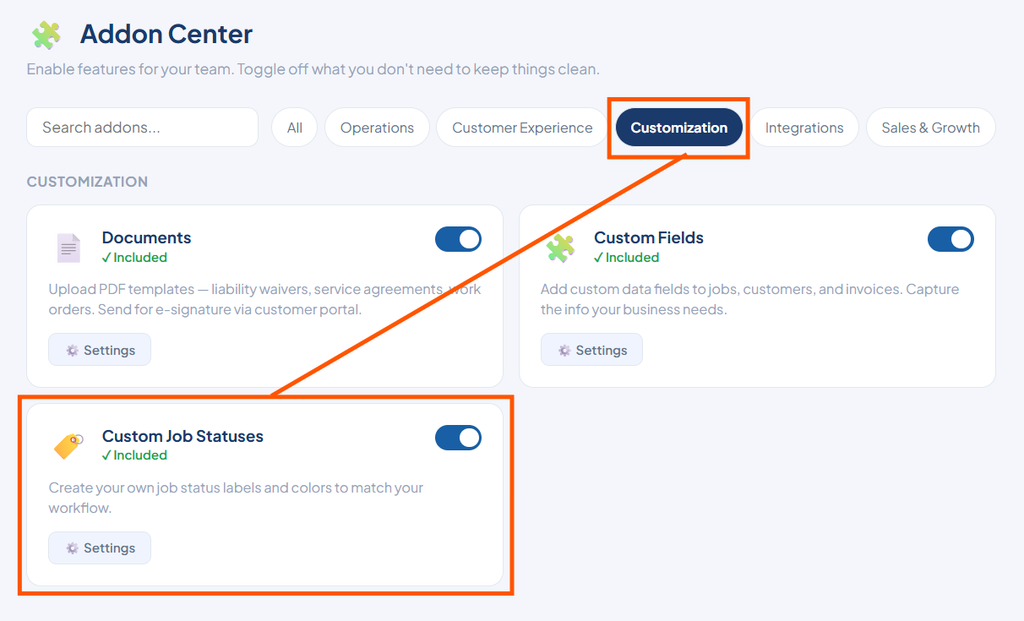
Open your add-on center, click on the customization tab, and open your custom job statuses settings.
2. Modify existing default statuses:
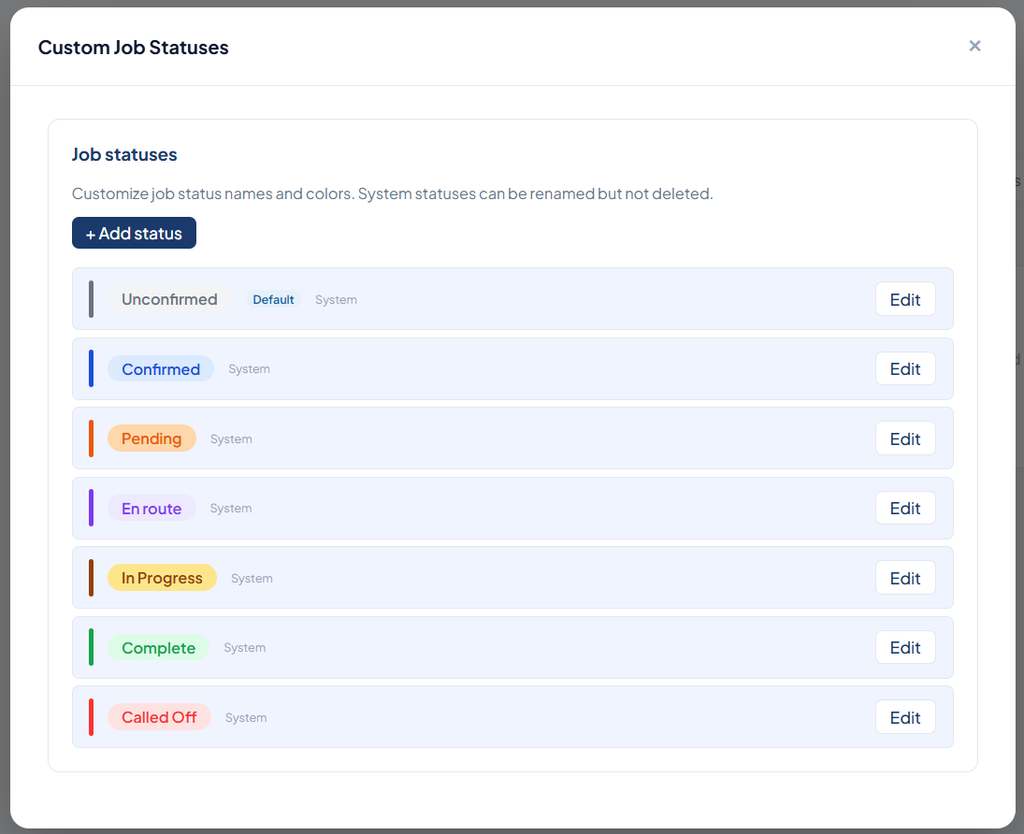
Review your list of default system statuses to rename or recolor them.
- Click edit on any default status.
- Type a new name in the text field.
- Select a new tag color.
- Click save.
3. Create a brand new status:
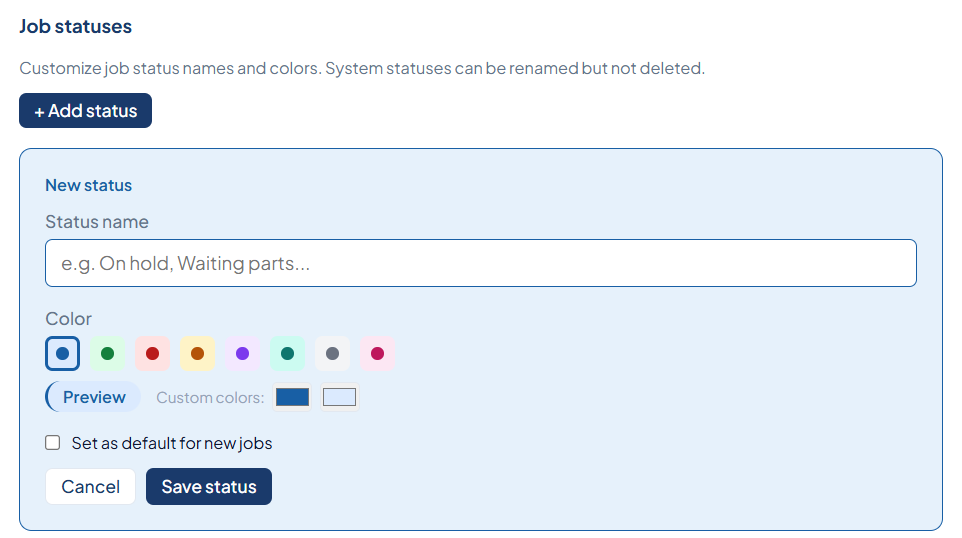
Add an entirely new step to your workflow tracker.
- Click the add status button located at the top of the page.
- Enter a custom name from scratch, such as waiting on parts or on hold.
- (Optional) Check the box to set this new custom status as the default starting point for all new jobs
Note
Default system statuses cannot be deleted from your account, but they can be completely renamed and color-coded to match your company’s preferred language.
Once saved, your updated and newly created statuses will be immediately available on your main jobs board as quick filter tags and within the status drop-down menu of individual jobs.