
In this article, you will learn how to quickly create, schedule, and dispatch a new job directly using the JobyDesk mobile app.
Creating jobs on the go allows field service managers and technicians to instantly log incoming work, assign available team members, and keep operations running efficiently from anywhere. By completing this process on mobile, you ensure immediate dispatching and full visibility across your team without needing to return to the office.
Creating and Dispatching a New Job
In order to create a job on mobile, you will need to access your JobyDesk Mobile App.
1. Open the Job Creator:
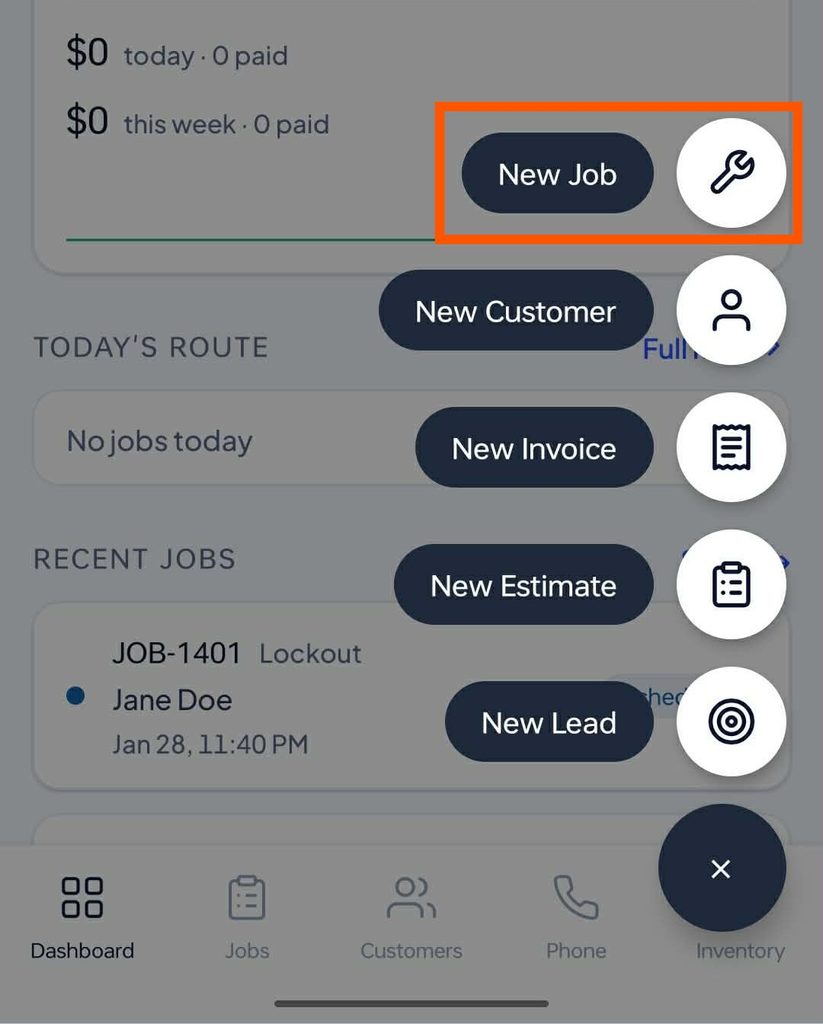
From your main dashboard, tap the floating + button in the bottom right corner, then select New Job to open the four-step job creator.
2. Select Customer:
Choose how you want to add the customer for this job:
- New Customer: Enter the customer’s First Name, Last Name, Company, Phone, Email, and Service Address.
- Existing Customer: Tap the Existing Customer tab, use the search bar to locate the client, and select them to automatically pull in their saved service address.
- Tap Next to proceed.
3. Fill Out Job Details:
Specify the core details of the job:
- Select a Job Type / Service from the dropdown menu.
- Choose a Source to track lead origin.
- Set a Priority Level (ranging from low to emergency).
- Enter specific instructions or notes in the Description box for your technician.
- Tap Next to proceed.
4. Schedule and Dispatch:
Set the timing and assign a team member:
- Adjust the Start Date and Start Time (defaults to current time).
- Set the End Time manually or use the Duration Shortcuts to calculate it automatically.
- Tap Assign Technician to pick an available team member from your roster.
- Check the schedule preview at the bottom to confirm the technician is free.
- Tap Next to proceed.
5. Review and Create Job:
Review the summary screen containing customer details, location, job details, and scheduled times. If everything is correct, tap Create Job.
Once created, tap View Job on the confirmation popup to navigate directly to the active job dashboard, where your team can check in, notify customers, launch GPS navigation, take payments, or access options like e-signatures and service reminders.