
In this article, you will learn how to capture new potential customers and move them efficiently through your sales pipeline in JobyDesk.
Effectively managing your leads is essential for growing your field service business. By organizing your sales pipeline, you can ensure that no inquiry slips through the cracks, allowing you to track job value, follow up on time, and ultimately convert more prospects into active work orders.
Creating a New Lead
To begin capturing a potential customer, you can access the lead intake form using one of two methods:
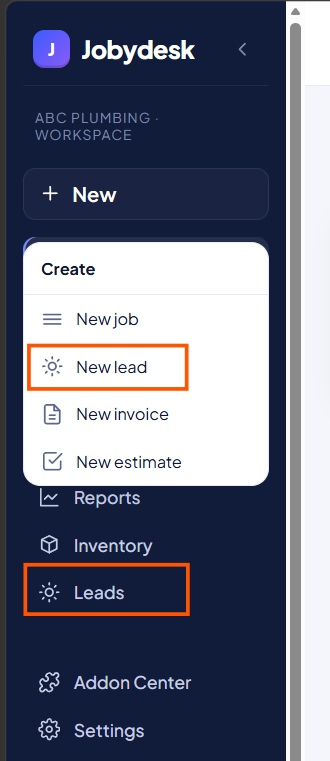
1. Use the Sidebar: Click the + New button on your left-hand sidebar and select New Lead.
Or use the Leads Dashboard: Navigate to the Leads dashboard and click the + New Lead button located in the top right corner.
2. Once the intake form opens, enter the following details:
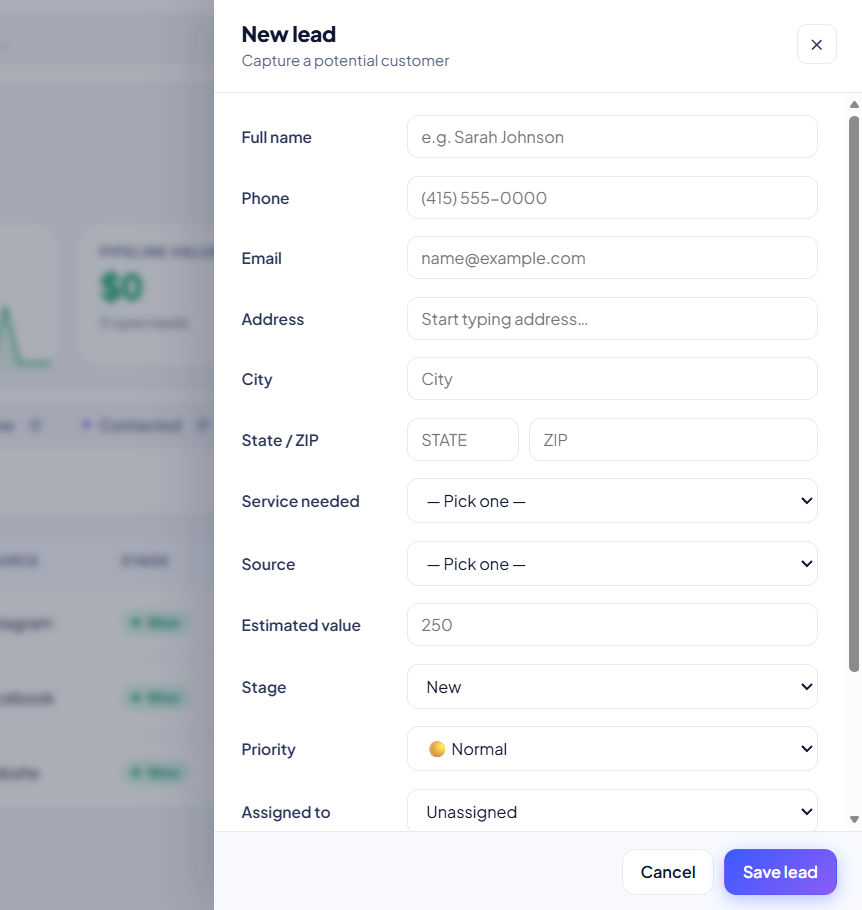
- Contact Information: Name and phone/email.
- Service Details: The specific service the customer needs.
- Source: How they found your business.
- Job Value: The estimated value of the project.
- Follow-up: Set a date and add any additional context in the Notes field.
4. Finally, click Save Lead to add them to your pipeline.
Managing Your Pipeline Stages
JobyDesk organizes your leads into the following stages:

- New: Fresh, untouched inquiries.
- Contacted: You have reached out to the customer.
- Quoted: Pricing has been provided.
- Followup: Leads requiring a reminder.
- One: The customer is ready to book.
- Lost: The customer declined or stopped responding.
Updating Lead Status
You can update a lead’s stage using two methods
- Visual Drag-and-Drop: In the Board View, click and drag the lead card into the appropriate column as the conversation progresses.
- Details Panel: Click on a lead to open their details panel. At the top of the panel, click the round stage buttons (e.g., Quoted or One) to update their status instantly.
Note
If you move a lead to the Lost column, the system will prompt you to enter a reason (such as “no response”), which helps you track why opportunities are not moving forward.
Once a lead is marked as One, click Convert to Job at the bottom of the details panel to turn the prospect into an active work order.
Related articles: