
In this article, you will learn how to build an invoice directly from a job, send it to a client, and record a collected payment using the JobyDesk mobile app.
Creating invoices directly within active jobs streamlines your billing workflow by automatically linking all customer details. This allows field service technicians and teams to accurately capture labor, parts, discounts, and taxes while on-site, ensuring faster payments and seamless job completion tracking.
Building, Sending, and Collecting on an Invoice
In order to create and process an invoice on mobile, you will need to access your Jobs list and open the active job requiring billing.
1. Open the Billing Tab:
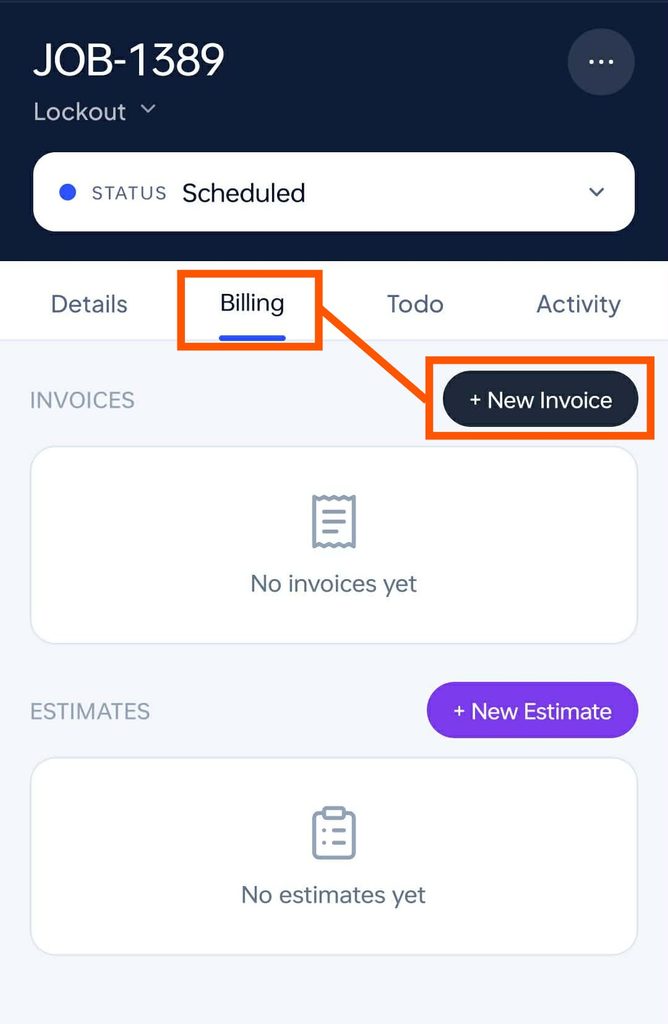
Navigate to an active job, select the Billing tab, and tap the + New Invoice button.
2. Add Line Items:
Add products or services using one of the following methods:
- Type an item name into the field to select smart predictions from your catalog.
- Tap the Price Book button to visually search pre-priced services and labor.
- Tap the Inventory button to select physical parts and materials.
3. Adjust Item Details:
For each added line item, modify the description, quantity, unit price, or tax amount as needed.
4. Finalize Totals and Notes:
Scroll down to complete the invoice details:
- Apply a discount by toggling the flat currency amount or percentage symbol (%) and typing in the value.
- Enter your overall tax rate percentage.
- Enter optional text into the Notes box.
5. Create the Invoice:
Tap Create in the top right corner.
6. Preview and Send:
To inspect the invoice before sending, tap the three dots icon and select Preview PDF. To deliver it, tap Send, verify or add recipient email addresses, and tap Send Now.
7. Record Payment:
Tap the three dots icon on the invoice and select Add Payment. Verify the amount, choose the payment method (such as cash, card, check, Zelle, Venmo, ACH, or other), confirm the date paid, assign who collected the payment (company or tech), and tap Record Payment.
Note
You can also quickly create a general invoice at any time using the floating + icon on your main dashboard or via the Invoices page in your sidebar menu. However, building an invoice directly from the Billing tab of an active job ensures the document is automatically linked to that specific client and job record. Once full payment is recorded on a job’s invoice, the app will prompt you to automatically mark the job as complete.