
In this article, you will learn how to manage a complete job workflow from the initial office dispatch all the way to final client payment and closeout.
Efficiently tracking your projects ensures your field service operations run smoothly. This workflow allows your team to maintain complete visibility over client information, schedules, line-item pricing, and task checklists, ensuring no critical steps are missed during a job’s lifecycle.
Navigating the Job Pipeline
In order to view and update your active jobs, you will need to access your main project management area.
1. Open Jobs:
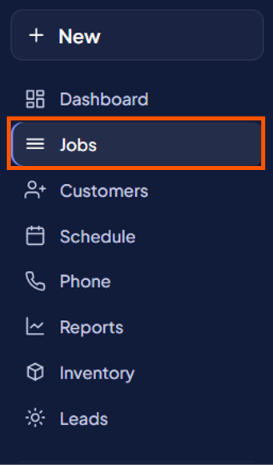
From the main dashboard, look at the left sidebar and click on Jobs.
2. Open the Job Summary Panel:
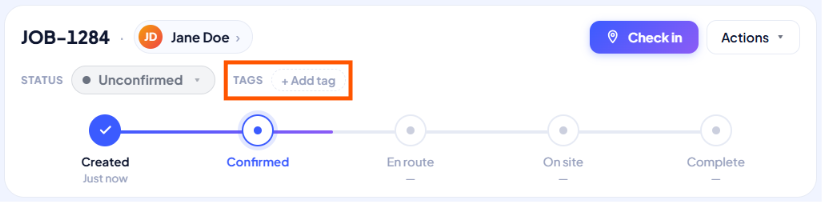
Select any active ticket from the list to open its summary side panel directly on your screen. You can categorize your work instantly by adding or creating custom tags at the top of the panel.
3. Review and Update Job Details:
Use the Details tab as your central command center to organize and manage core project information:
- Review client info, direct contacts, service address maps, and location notes.
- Manage core job details like service type, source, description, priority, schedule windows, assigned team members, and custom fields.
- Change the status dropdown from unconfirmed to confirmed to advance the job in your pipeline.
4. Apply a Checklist Template:
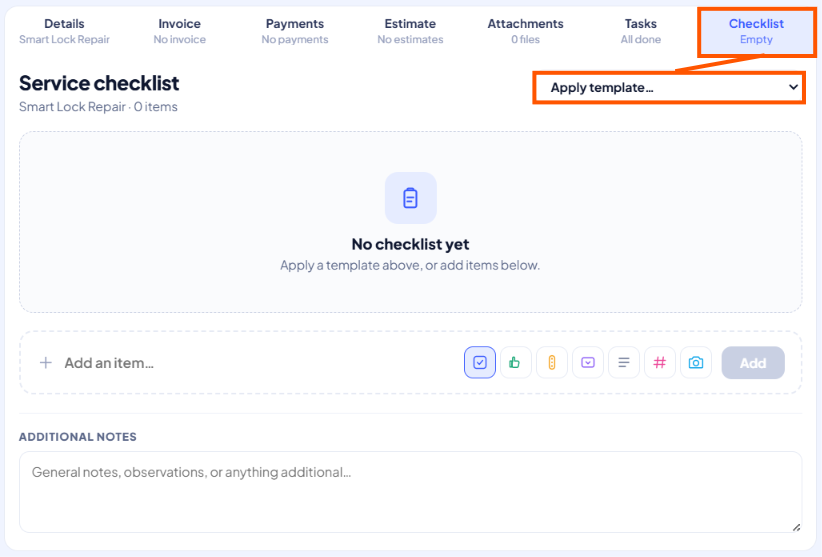
Jump over to the checklist tab to apply a pre-built standardized template, ensuring your team completes every necessary step.
5. Track On-Site Progress:
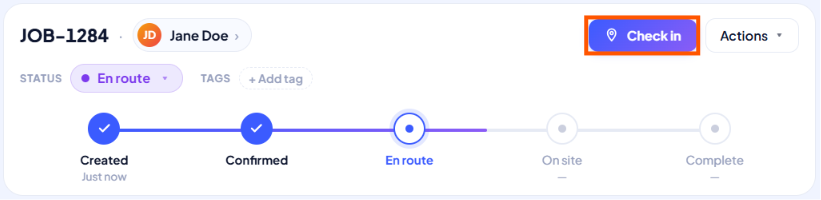
When the technician is ready, update the status to en route. Upon arrival at the client site, click the Check in button. This action automatically shifts the status to in progress and starts a live on-site timer.
6. Create and Send an Estimate:
Navigate to the Estimate tab within the job summary panel to draft a professional quote detailing all required parts and labor, then send it to your client for online approval.
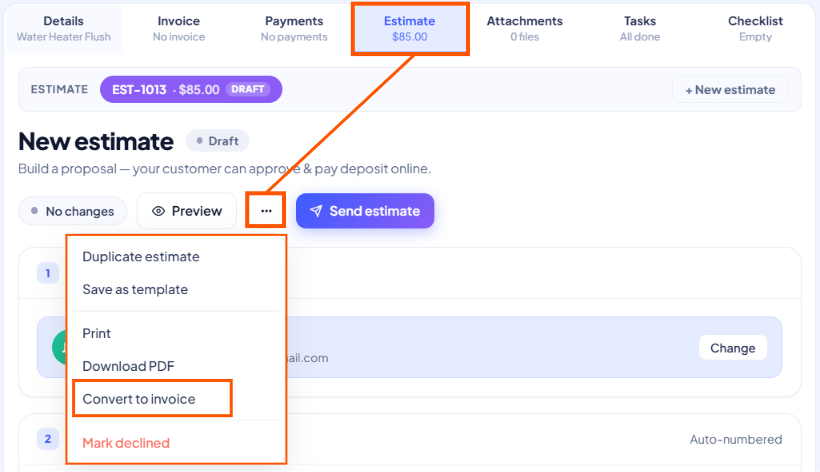
7. Convert an Estimate to Invoice:
Once the client approves the estimate, open the More Actions menu located on the quote and select Convert to Invoice. This action automatically carries over your line items and billing details onto a newly generated invoice page.
8. Record Payment and Close the Job:
Navigate to the Payments tab, enter the appropriate payment amount, select the payment method used by the client, and Save the transaction to clear the outstanding balance.
Notes
As soon as the payment is processed and the invoice balance hits zero, a pop-up window will appear asking if you want to complete the project. Clicking mark complete will automatically update the job status and stop the active on-site timer at the same time.
Once marked complete, your job workflow is officially wrapped up cleanly and efficiently.